Recent Posts
What an Insurance Company Will Cover After Water Damage
2/17/2022 (Permalink)
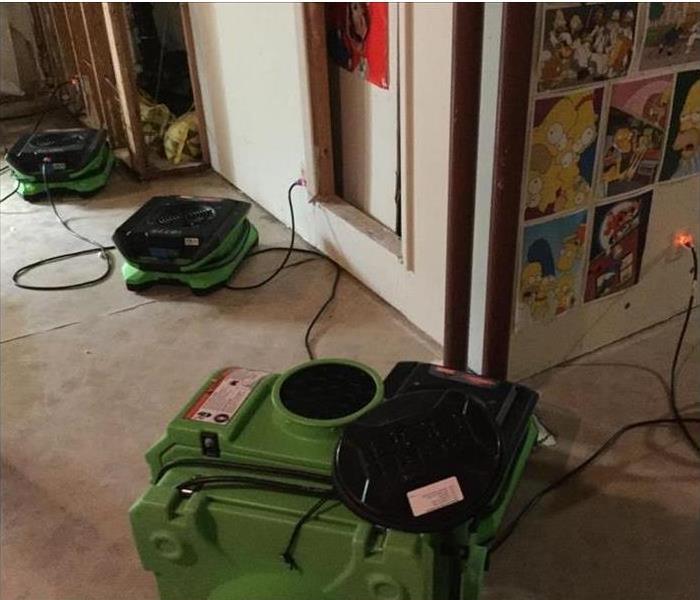 Our SERVPRO team is in action and working hard to ensure that this home is cleaned up and restored back to pre-water conditions. Call us!
After Water Damage, What Will An Insurance Company Cover?
Dealing with the repercussions of a flood or a pipe burst in your Kansas City, MO, home can lead to one massive headache. However, it helps to know what your homeowner’s insurance coverage entails and what you can expect to gain from your policy. Whether you have minor or severe water damage, here’s what many insurance companies will cover to help repair and restore your home.
1. They should cover the cost of the damage caused by a broken pipe, but not necessarily the pipe itself.
When it comes time to fix a broken pipe, some insurance companies believe that if a leaking pipe has carried on for a significant amount of time without being treated, then it’s considered ‘homeowner negligence.’ This means they might not cover the cost of the new pipe replacement. However, almost all insurance providers will cover the costs for the extent of the damage that occurred to your home after the pipe burst, including building materials, structural supports and so on.
2. Once a pipe bursts and a resulting flood ensues, that kind of extensive damage will generally be covered.
If a sudden pipe burst happens without any knowledge of leaks beforehand and such an occurrence leads to a massive flood, your insurance company will cover the damage if you have an all-perils policy. This can include anything from carpeting and paint to drywall, as well as the cost of any professional services required to come in and clean up your living space to make it safe for habitation. However, coverage for full-blown flooding versus less-severe water damage can differ depending on your policy, so it pays to be extra cautious when considering which plan to choose for preventative measures.
If a considerable flood occurs in your Kansas City, MO, home, it’s important to seek professional guidance before trying to make any repairs or restoration yourself. This is especially true when it comes to your insurance policy, as you might be covered for more damages than you know.
I Smell Gas – What Should I Do?
2/17/2022 (Permalink)
 SERVPRO is available 24/7, 365 days a year to help with any size fire or water loss.
I'm Getting A Whiff Of Gas - What Am I Supposed To Do?
As a homeowner in Gladstone, MO, you want to do everything you can to make sure your loved ones are safe. The threat of a gas explosion is something you should always be prepared for. Every year, thousands of people are injured and homes damaged because of natural gas fires which could have been avoided. Expensive structural repairs requiring the services of a fire restoration company are often the result. In many cases, these fires could have been prevented had quick action been taken. So, what should you do if you smell gas in your home?
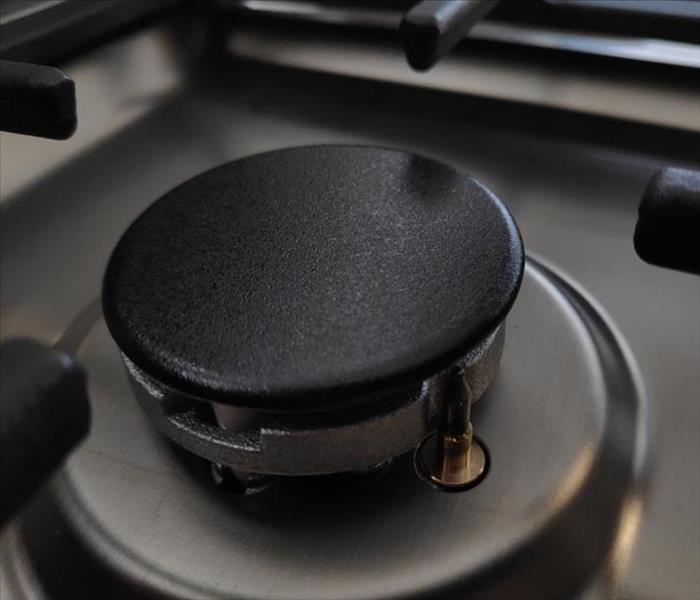
1. Find the Source of the Odor
Check your stove to see if the burner has been left on without the gas being lit. If this isn't the source, check along the gas lines for a hissing noise. Check for leaks behind water heaters or other gas appliances.
2. Find the Gas Shutoff Valve
If the source is not evident, locate your gas meter. The shutoff valve is attached to the meter. Using a wrench, turn the valve to the "off" position.
3. Ventilate the Area
Open all the windows in your home, as well as the doors. This way, any gas trapped in the house can be vented to the outside.
4. Do Not Light Matches or Lighters
This may appear to be common sense, but flames must be avoided until the source of the gas smell has been located. Don't try to light cigarettes or candles if you smell gas!
5. Don't Make a Spark
Keep the lights off if you smell gas. Turning on a light switch could cause a spark, which could set off a gas fire.
6. Vacate Your Home
If you still haven't located the source of the gas leak, leave your home and get to a safe location, well away from the house. Call 911 or the gas company for help.
If you smell natural gas in your home, you need to act right away. These common-sense tips can help you to prevent a gas fire from happening.
What a Tenant Is Liable for After a Flood
2/17/2022 (Permalink)
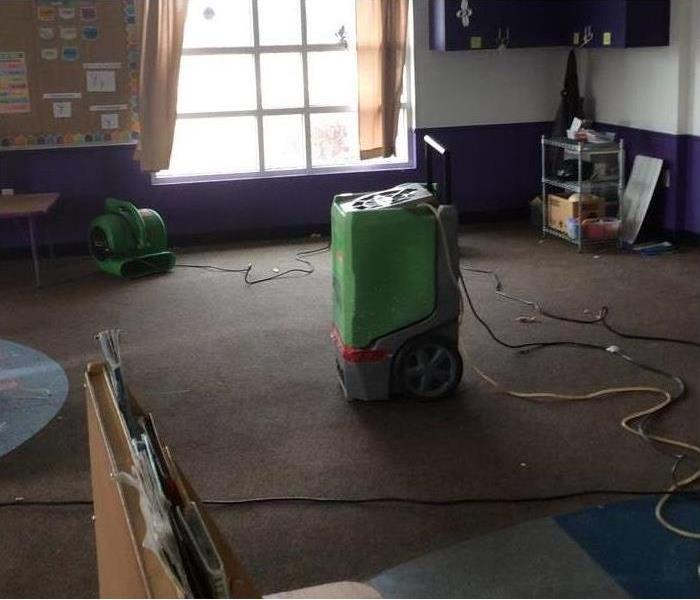 In any flood damage, SERVPRO uses professional equipment for drying and restoring your property back to normal conditions. Call us!
After A Flood, What Is A Tenant's Liability?
Flooding at your property can be very stressful. The last thing you want is to go through a disaster and have no renter’s insurance or any idea how to proceed. As a renter, it is best to prepare and know for what you are accountable. This breakdown of duties can help you avoid confusion.
Tenant Responsibilities
As a renter, you are more protected than you might realize. For instance, if you can no longer occupy your commercial space because of flood damage, you have some options:
- Most insurance coverage will take care of temporary relocation costs. If your business is unable to be used because of excessive damage, you will have the option to move.
- You will not be obligated to pay for the amount of time that you have vacated the original space. What if you are not displaced but the damage is still significant? You might be able to ask for a rent deduction.
- You should also have the option to cancel your lease when you need to relocate. Make sure to inform the property owner either before moving out or soon after.
One thing a tenant should always have is renter’s insurance. You can never predict when disaster will strike in Liberty, MO. Since you are still responsible for your possessions, it would be better to know that you are covered.
Property Owner Responsibilities
The property owner is responsible for all damage done to the building they are leasing. That includes anything rented to the tenant, such as appliances. However, most property insurance does not include flooding. Property owners should look at their policies and buy flood insurance if needed. The number of a water damage repair service can also come in handy when an emergency arises.
At flood at your property does not need to be the end of the world. As a tenant, make sure you have good renter’s insurance and honest communication with the property owner. As an owner, flood insurance may be a wise idea. Stay prepared, and you can hopefully avoid stress and get back to normal in no time.
How Do I Maintain a Fire Sprinkler System?
1/28/2022 (Permalink)
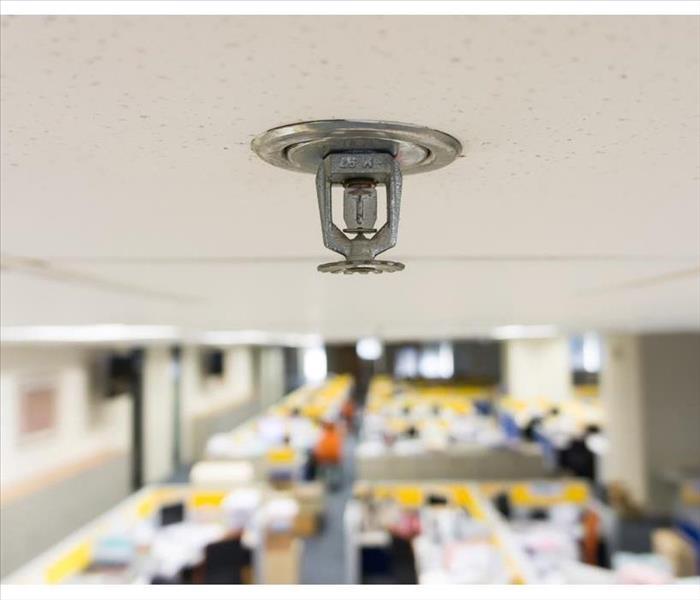 Inspect sprinklers regularly and do not ignore repairs.
What Is the Best Way to Maintain a Fire Sprinkler System?
As a business owner and manager, you can carry many responsibilities. Two of those are likely safeguarding company property and inventory and keeping employees and customers safe. Installing a fire sprinkler system can be a great way to accomplish both goals. In fact, a national standard called NFPA 13 has been established to set down procedures and conditions for installing fire suppression measures such as sprinkler systems in commercial buildings.
You probably never want to need such measures, but fires can happen due to many causes. Should a suppression system be activated to quench a blaze within your facility, the aftermath may involve fire sprinkler cleanup. If a fire threatens your Gladstone, MO, commercial building, you should know the sprinklers are well-maintained and there is a plan for cleaning up the mess. Here are three considerations for maintaining commercial emergency sprinklers and planning for cleanup.
1. Inspect sprinklers regularly and do not ignore repairs. Carefully check and test your structure’s emergency fire sprinkler system regularly. Local laws and insurance considerations may dictate the inspection schedule. If any problems are found, fix them immediately. In addition to being a safety issue, sprinkler problems may violate insurance and legal regulations.
2. Clearly delegate responsibilities. You should be clear about who is responsible for fire suppression maintenance. For example, should business owners or building owners schedule regular inspections and tests? Those who arrange for regular checks also should know they must inform the fire inspector.
3. Have a plan for after the blaze is out. Who wants to think about a building fire? However, every business facility should have a professional fire restoration team they can call on to repair and clean up the damage.
Should a blaze flare up in your Gladstone, MO, commercial property, you should make sure everyone is safe. A fire sprinkler system can be an effective fire suppression tool that can hopefully quench the flames before they destroy significant property and equipment. Once a blaze is out, though, you should deal with fire sprinkler cleanup. An experienced fire restorer can work to restore your business to its pre-fire condition.
Top 3 Common Places in Your Home Mold Might Be Hiding
1/28/2022 (Permalink)
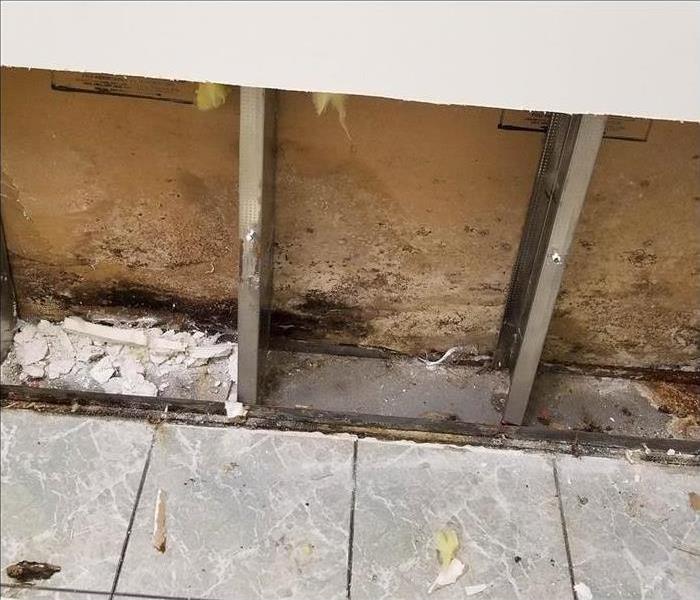 Mold found behind a wall due to water damage.
Hidden Places You Can Find Mold
If you notice a musty smell in your home or leaking water, it is possible that mold might be hiding in spots that you don’t check often. When it comes to combatting mold growth, immediate action is the key to preventing extensive damage to the structure of your home. If you suspect that mold might be lurking in your home in Liberty, MO, but aren’t sure where to look, inspect these three common hidden places where mold is often found.
1. Behind Your Walls
Mold often grows inside your walls when your home has recently experienced water damage due to flooding, a leaking roof, or a broken pipe. If you notice peeling wallpaper or mold on the surface of your wall, there’s a good chance that mold has already made its way inside. Once this has occurred, the removal process can be quite lengthy and require replacing sections of moldy drywall. It is essential you contact a mold remediation specialist who can determine the extent of the damage and take the appropriate action.
2. Beneath Laminate Flooring
Flooding and large, uncleaned spills on laminate floors can result in water damage if left unaddressed. Although this type of flooring is designed to be water-resistant, large puddles of water can soak its ways into laminate and settle underneath. You can tell this might be a problem if you notice warping, cracking, crowning, or other damage to the surface of the floor.
3. Underneath the Sink
If you don’t often examine the area beneath your sink for mold growth, now might be a good time to start! Leaks, spills, and increased humidity can lead to this issue. If you notice mold on wood underneath your sink, the correct cleaning method will depend on whether the wood type is porous or non-porous.
When left untreated, mold growth in your home will only get worse. If you suspect there might be mold in your home but can’t easily locate it, try inspecting these three common, hidden places!
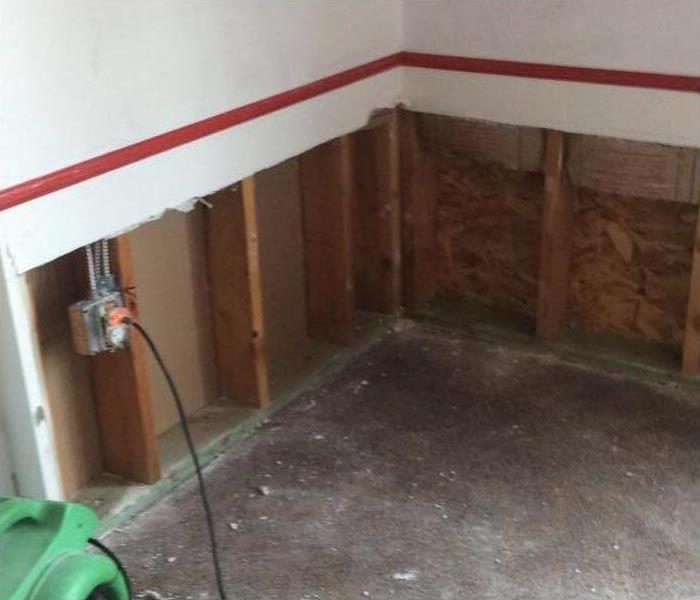
3 Important Facts About Flood Damage Cleanup
1/11/2022 (Permalink)
 Storm water intrusion in a home in Kansas City, MO.
Understanding the Difference of Outdoor Floods
When heavy flooding occurs in Kansas City, MO, it can cause widespread damage throughout your home. From soaked drywall to standing water that can warp or rot wooden or carpeted flooring, flood waters can wreak havoc on every level of your house. However, before you begin the cleanup process, it is important that you understand the difference between storm floods and those that stem from plumbing problems, as the remediation and restoration for each can differ.
1. Storm Floods Are Usually Widespread
When violent storms cause flooding, the water can be difficult to control or divert. Even streams or creeks that spill over during heavy rain are capable of creating significant flood waters that can pour into your home. When this happens, almost any room can be affected, and unlike small plumbing floods, the water cannot be confined to one area.
2. Flood Water Is Contaminated
Flood damage cleanup presents a unique set of challenges because of the condition of the water. Overflowing sewers, animal waste and pesticides from flooded lawns can severely contaminate flood water and make it dangerous to handle. Experienced technicians that work at a storm cleanup and remediation service usually call this Category 3, as it did not come from a sterile source, such as a broken kitchen pipe or water line, both of which are generally considered Category 1.
3. Mold Growth Can Happen Quickly
Standing water that stems from heavy floods can increase the humidity in your home and accelerate mold growth on walls, ceilings and furniture. Having the rooms drained as soon as possible can decrease this type of water damage. However, if mold develops afterward, it is wise to ask your cleanup technicians to perform a flood cut in each room to ensure no fungi has spread into the interior walls.
Flooding can cause significant damage when it invades your Kansas City, MO, home. Understanding the difference between outdoor floods and those that begin indoors will likely make the cleanup process less stressful.
Wood Floors and Water Don’t Mix: How Soon To Clean Up a Wet Floor
12/27/2021 (Permalink)
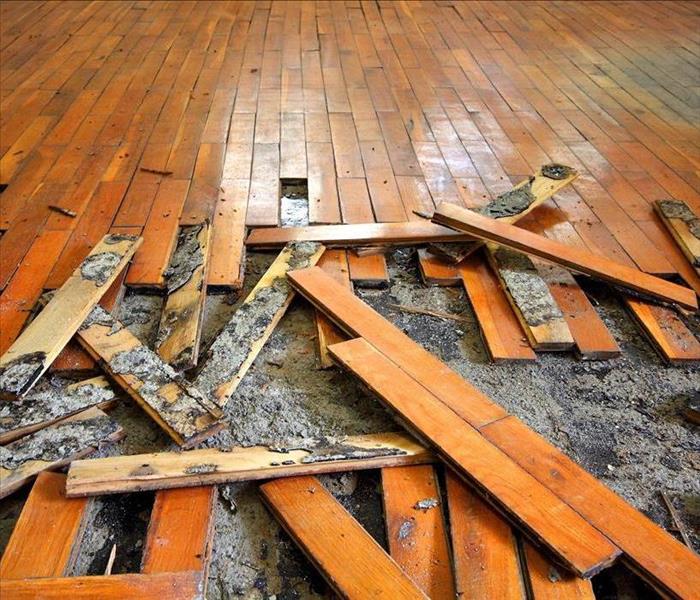 Wood floors are prone to damage when exposed to water.
How Soon To Clean Up a Wet Floor
Hardwood is a popular flooring material for many commercial facilities. While beautiful and trendy, wood floors are prone to damage when exposed to water. But how quickly should you act when your wood floor gets hit with water? From a spilled cup to a pipe burst, learn what to do and when to take action to prevent serious damage.
Minimal Water Exposure
Because wood floors are often used in a variety of professional settings, contact with water may be unavoidable. Instead of cleaning the wood with water, use a minimal amount of hardwood floor cleaner for regular mopping. There are several ways you can avoid damage from a wet floor:
- Place rugs at entry points and high-traffic areas.
- Quickly towel up small spills and wet footprints.
- Refinish floors when needed so that they have a protective coating.
Heavy Water Exposure
Unlike the occasional spill or splash, a pipe burst or other water emergency can be cause for greater concern for your beautiful wood flooring. A burst water line can happen all at once or may go unnoticed for a time. Once the water is spotted, the best practice is to act quickly.
Start by shutting off the main water supply to prevent further water exposure. Next, remove as much water as possible from the affected area. A submersible pump or wet/dry vacuum should do the trick. If you do not have access to this equipment, you may want to turn to a professional water cleanup service.
Restoration and Replacement
Once all of the water has been removed, you will need to assess the resulting damages. Wood is susceptible to rot and swelling after longstanding contact with water. Some incidents may be resolved by drying the floor with a dehumidifier, while others may call for replacement of damaged wood altogether.
A pipe burst in Liberty, MO, can cause serious damage to your wood flooring. After flooding, take immediate action to clean and dry your floors to avoid costly replacement.
How To Prevent Water Damage
12/22/2021 (Permalink)
 Flood cuts after water damage in a home in Gladstone, MO.
How To Prevent Water Damage At a Residence
Maintenance is the best way to prevent water damage. A number of appliances and systems rely on water in the home in order to function. Learn more about how to prevent damage at a residence in Gladstone, MO.
Appliances
A number of appliances rely on water in order to function. This machinery includes:
- Dishwashers
- Washing machines
- Water heaters
Connections or hoses may fail and lead to leaks. It is a good idea to closely monitor these machines and have them regularly serviced for maintenance rather than just for repairs.
HVAC System
The HVAC system in a residence relies on water, particularly when cooling. Several common causes of leaks include:
- A dirty coil
- An icy coil
- A damaged overflow drain pan
- Clogged drain lines
Regular maintenance can also help to prevent HVAC leaks. Schedule a yearly inspection and cleaning to reduce the risk of water damage.
Plumbing
Plumbing is the major source of water in the home, and therefore one of the most common causes of damage. A homeowner should know the age and condition of pipes. Look out for any signs of:
- Leaks
- Sewage backups
- Malfunctioning toilets
- Corroded supply lines
If you have exposed pipes, it is a good idea to add insulation. You can also drip a faucet when temperatures dip below freezing to relieve the pressure that can lead to pipe bursts. Any incidents will necessitate broken pipe repair and water damage cleanup.
These appliances and systems are the most likely sources of damage due to water in the home. Even if you take preventative measures such as performing regular maintenance, an accident may still occur. In these instances, it is important to quickly arrange for pipe cleanup. Appliance specialists or plumbers can fix the cause of damage, and mitigation professionals can remove water and promote drying. These measures are necessary to keep damage from worsening or resulting in secondary issues, such as mold.
Tips To Prepare Kids for a House Fire
12/21/2021 (Permalink)
 Home fire in Kansas City, MO.
What To Do In a Home Fire?
Your kids’ safety is of utmost importance. You teach your children to look both ways before crossing the street and to stay away from strangers. But, as a parent and homeowner in Kansas City, MO, do you educate your children on what to do in a home fire? When a fire emergency occurs, every second counts. Have a fire escape plan and practice it with your children. Review the tips below to educate your family.
Practice a Fire Escape Plan
Teach and practice the following techniques with your children during a non-emergency, so your family knows what to do in the case of a home fire:
• If the smoke alarm sounds at night, roll to the edge of the bed face down, place the closest hand to the floor and slide off the bed.
• Crawl to avoid smoke in the air on knees and forearms with head down, or crawl like a snake.
• Check doors before opening by feeling for heat. If hot, find another way out of the room. If warm or cool, open slowly and check for fire. Close doors as you go.
• Create and practice an escape route and agree on an outdoor meeting place. If trapped, go to the window, open it, climb out if possible or yell for help. Once out of the house, do not return inside for any reason. Preventative Measures for Kids. Aside from teaching and practicing the above techniques, follow these kids’ safety tips:
• Maintain at least one functioning smoke detector at each level of your home. Teach your children that the alarm sound means there is fire and smoke in the house.
• Keep lighters and matches out of the reach of young children. Instruct older children not to play with these or other flammable objects, such as candles. By teaching and practicing the above tips with your children in Kansas City, MO, your family is prepared for a home fire. Once your kids’ safety is secured and the fire is out, contact a fire restoration specialist and your homeowner’s insurance agent to begin the process of returning your home to pre loss condition.
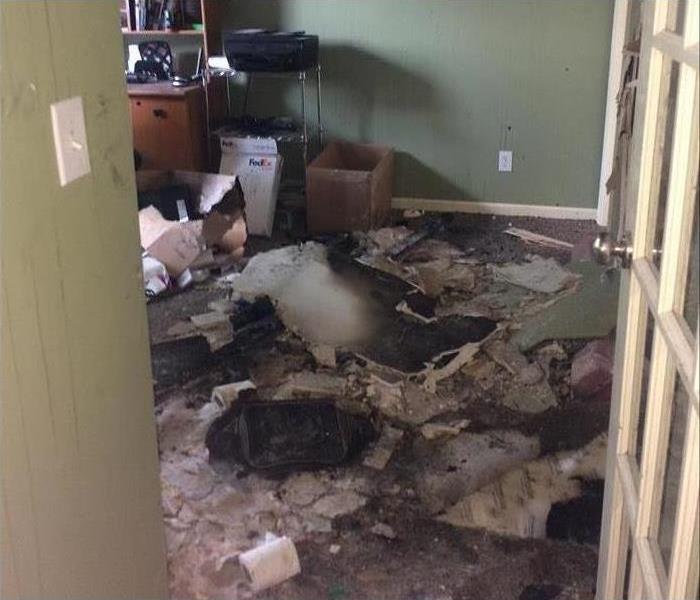
How To Fix a Flooded Basement
11/28/2021 (Permalink)
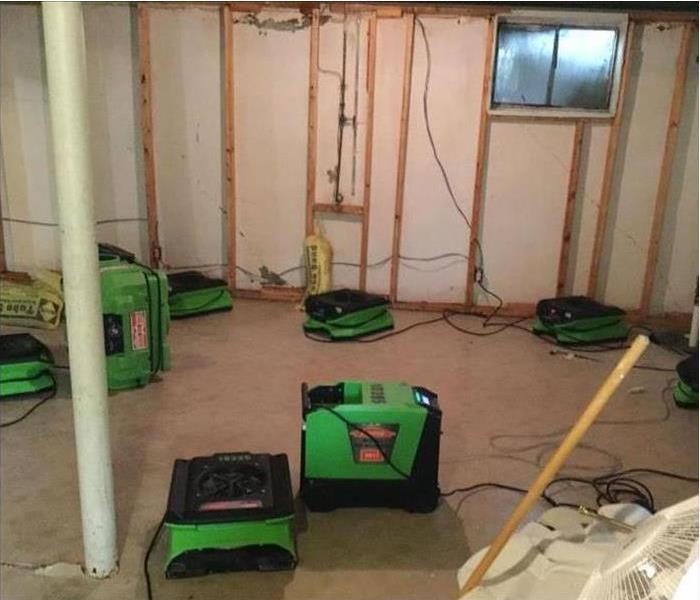 A flooded basement in Liberty, MO.
How to Repair a Flooded Basement
Despite your insurance coverage, a basement flood may be a terrible thing that can leave homeowners in complete disarray. Thankfully, the cleanup process can be straightforward and manageable. Follow the steps below to restore and protect your home from current and future flood concerns.
1. Pause and Be Safe
While it may be instinct to rush into a flooded basement and salvage everything as quickly as you can, you may want to slow down and take in your surroundings. Floodwater presents both slip and fall and shock hazards. Before entering the damaged area, turn off the electricity and put on protective clothing, like rubber boots and gloves.
2. Drain and Tear Out
Cleanup from a basement flood often requires the removal of excess water and the tear out of drywall and insulation, depending on the extent of the damage. You can rent a variety of pumps, either submersible or above ground, to quickly remove water. When removing drywall and insulation, consider tearing away material at least 20 inches above the water line to prevent any mold growth.
3. Discard and Salvage
While many items may have sentimental value, be aware that porous objects like clothing and paper can carry bacteria and produce mold after a flood. Additionally, any appliances that were touched by the water may require inspection by a professional in Liberty, MO, before further use. The main thing is to remove any sign of contamination.
4. Plan and Prepare
After a flood, you can install backflow valves, and sump pumps to help protect against basement flood reoccurrence. You may also want to inspect the grade of your landscaping as well to ensure that your homes drainage systems are in peak shape. Installation of preventative measures and routine maintenance can help prevent this type of disaster from happening again.
A basement flood can be a damaging and upsetting event. From the lost memories to the worrisome costs, a flood can be detrimental to homeowners. However, by following the above steps and preparing for potential future risks, homeowners can begin to ease even their worst concerns.


 24/7 Emergency Service